Exporting from Drupal
Use Views Data Export module and these instructions.
When exporting tags there’s a couple options.
1. You can have all the added tags in one field value.
2. You can export each taxonomy individually.
Depending on how you want the tags within the WP site you may prefer one way or another. I’m creating sub categories so I think I want them separately and so will be able to have better control over them. If you’re just throwing them all at the same level, then option one may work fine.
Go through each field added for export and simplify output.
Use ‘plain text’ wherever you can.
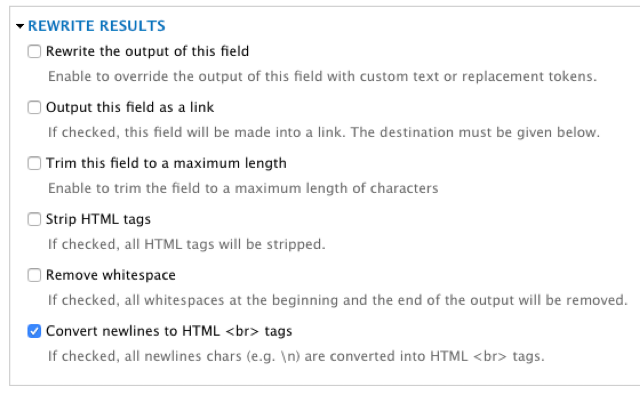
CSV entries must all be on one line so for multiline items like ‘body’ you can try rewrite results and use convert newlines to HTML (as seen below). However this didn’t seem to work for my ‘body’ field exports.
What did work was checking the ‘Replace newlines in rendered fields.’ checkbox in ‘Settings’ under the ‘Format’ header.
Also in here is the ‘Keep HTML tags’ checkbox. I tried this but it left spans/links in fields and I didn’t want them.
The ‘Quote values’ checkbox is useful if you’ll have text within the values that match the CSV separator; in my case a ‘,’ and I did have it in fields like tags.
The ‘Make first row a list of column headers’ put empty quotes in the CSV but without any text in them. That’s okay, I’d change the headers on import to WordPress so they match the new fields.


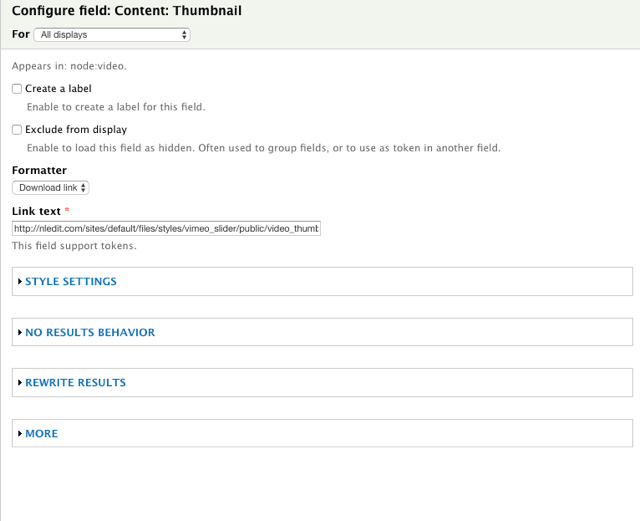
When I exported an thumbnail image I selected ‘Download link’ under the ‘Formatter’ within the fields settings. I then hardcoded the path to the directory where all thumbnails are kept and used the [file:name] placeholder at the end. Fortunately in this case all the thumbnails were in the same directory and are publicly accessible. On the WP side we’ll use this link to download and import the images.
There may be other more dynamic ways to get paths with the ‘Rewrite Results’ section, but I didn’t look into it.
I also needed to remove a file size string which is tacked on to the end of the output. It looked like this (14.75 KB).
After some initial searching I couldn’t figure out how this was being added. I thought maybe it was coming from the [file:name] placeholder but I removed that and it was still there. Maybe it’s a setting somewhere but the quicker fix right now for me is a regex replace.
Here’s the string pattern I was looking at (the space before the ‘“’ didn’t always appear: jpg (14.75 KB) ".
Here’s the regex to match it: \s\(.*B\)\s?.
Regex replace in your favorite editor with nothing and you’re left with a usable url!
Edit: And now that I get back to this, I seem to think the size value was from a template I added/altered in the theme 2 – 4 years ago. You probably won’t have this issue, but it is an example of what could be done to fix things like this within a .csv file.
Also note that the CSV designated escape character is ” (double quote).
You’ll see values like "Value string ""with inner values in double quotes""right next to each other even”", and it’s legit.
Additionally I noticed some special chars like “ which were mismatched with regular ". I decided to let them be as it may be easier to edit within the new db.
It will probably take multiple exports to get it right. I save the csv exports with a filename like this talent-video-export-09-26-2018-12-09 PM.csv. You could just replace the file each time, but I’ve found it useful to compare to earlier exports and spot differences when applying different settings.
The idea is to experiment and see what works for your specific content.
Importing to WordPress
With the plugin we’re using, Really Simple CSV Importer, we need to have the matching taxonomy terms already in the db. So make sure that any tags you exported from Drupal have matching items in your WP install.
At this point it’s time to look at what your CSV headers look like. The headers are the first line of the CSV file. You can use strings like “post_title” or “slug” and they will be used when creating the post in the usual post object items. You can also update already existing posts by adding a “postid” header. If you add a header which does not correspond to a matching column in the wp_post table then it will be added as a custom field (post_meta).
Additionally, if you are using Advanced Custom Fields you can put your keys in as a header (“field_59778b0025d67”) and the value will be imported using ACF’s update_field function.
If you’re looking to import multiple values for a select or checkbox the developer has an example.
If you want to add a taxonomy term use the syntax “tax{taxonomy}”. “tax” is a prefix, and {taxonomy} is the name of the taxonomy.
Filters
Really Simple CSV Importer has some pretty handy filters which makes it possible mold the imported data to fit your needs.
This is another point you can adjust or add to the data you’re importing. You can do calculations or add data based on a rows unique values.
really_simple_csv_importer_save_post($post, $is_update)
This filter is applied to the post data. You can alter, remove, or add data for the post being created with this particular row of the CSV.
For instance, you can set the post be published or to be added as a custom post type.
$post['post_status'] = 'publish';
$post['post_type'] = 'project';
really_simple_csv_importer_save_meta($meta, $post, $is_update)
This filter can filter adjust the meta values being saved.
really_simple_csv_importer_save_tax($tax, $post, $is_update)
This filter can adjust the taxonomy being added to the post.
really_simple_csv_importer_save_thumbnail($post_thumbnail, $post, $is_update)
This filter can alter the thumbnail data.
really_simple_csv_importer_post_saved($post)
This filter allows you to do things after a post is actually saved. I’ve used temporary image urls imported from the server and pull those image files over, add them as media to WP and update an ACF field with the new $attachment_id (using one of the plugins helper classes).
add_filter(‘really_simple_csv_importer_post_saved’, ‘really_simple_csv_importer_post_saved’, 10, 3);
  function really_simple_csv_importer_post_saved($post) {
    if (is_object($post)) {
      $image = $post->thumbnail;

      $h = \RSCSV_Import_Post_Helper::getByID($post->ID);
      // Get the remote image data
      $file = $h->remoteGet($image);
      // Then, attach it
      $attachment_id = $h->setAttachment($file);
        // Finally, replace the original data with the attachment id
      $h->setMeta(array('image' => $attachment_id));
      // add acf field category_play_all_thumbnail
      update_field('field_5babd1237ae40', $attachment_id, $post->ID);

      // add credits field to Content flexible content field
      $temp_credit = get_post_meta($post->ID, 'credit_temp')[0];
      $sub_fields = array(array('credits' => $temp_credit, 'acf_fc_layout' => 'spot_credits'));
      update_field('field_59778f7a4af43', $sub_fields, $post->ID);

        // delete the custom meta field added by the plugin on import
      delete_post_meta($post->ID, 'credit_temp', $temp_credit);
    }
  }
Now make sure you’ve exported your db because more than likely you’ll want to start over. I know I generally do.
Before running the full CSV file I duplicate it and delete all but one or two rows. This makes for a faster import. There will be things that won’t work and you’ll need to debug it; try different headers, figure out how to add ACF repeater fields, etc.
Run it, see what worked and what didn’t then delete the database and import your backup. Make your changes and try again. Rinse and repeat.
When things seem to work then try the full CSV.
Review
Backup your database.
Three main points to get the data into the format needed for your site.
1. Within the view export from Drupal.
2. Editing the exported CSV file manually or using regex replace.
3. Using the filters from Really Simple CSV Importer.
Hey, backup your database.
Look at the Really Simple CSV Import plugin, there’s more information there (within the support pages too) I likely didn’t cover or even hint at.